December 10, 2024 by Holger Kock, Fraunhofer-Gesellschaft
Collected at: https://techxplore.com/news/2024-12-free-fall-quality-precision-production.html
In industrial stamping processes, several hundred sheet metal parts are typically produced per minute. Together with the stamped parts manufacturer Quittenbaum GmbH, researchers at Fraunhofer IPM have now for the first time developed and installed an optical inspection system that checks the dimensional accuracy of every single component in high-speed stamping processes—with an accuracy in the range of 100 micrometers.
Connectors, sleeves or pins are stamped from sheet metal with high precision and in high volumes. They are used in numerous high-tech products such as automobiles, in telecommunications, in electronic systems or in medical technology.
Until now, quality assurance has not been able to keep pace with the high production cycle in stamping processes. As a result, stamped parts are usually only tested on a random basis by visual inspection or with the help of CT scans.
Using a free-fall inspection system, a team from Fraunhofer IPM has succeeded in checking the geometric dimensional accuracy of 3D precision parts in the production cycle for the first time. The system was tested in a production process for plug connectors made of copper sheet, of which 330 parts per minute are manufactured.
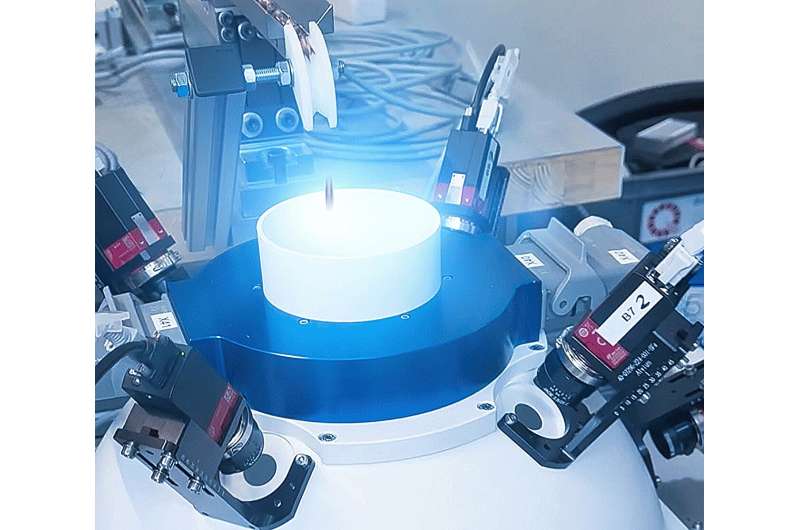
A component feeder developed by the manufacturer transports the individual parts, which are up to 40 mm in size, from the punching machine into a test sphere without any further handling. As the parts fall through the sphere, they are captured from different perspectives by 16 high-resolution cameras.
The objects are captured without shadows or reflections thanks to an indirect LED flash illumination. The measurement data is checked against the nominal CAD model so that defective parts can be ejected immediately.

The high processing rate for this computationally intensive analysis is achieved by fast inspection algorithms, parallelized camera control and several evaluation computers. During test operation, defective parts with geometric deviations in the range of 100 micrometers were reliably identified. The measurements were verified on a random basis using CT scans.
In a follow-up project, the partners from Fraunhofer IPM and Quittenbaum intend to investigate how the surface of the stamped parts can be efficiently inspected.

Leave a Reply